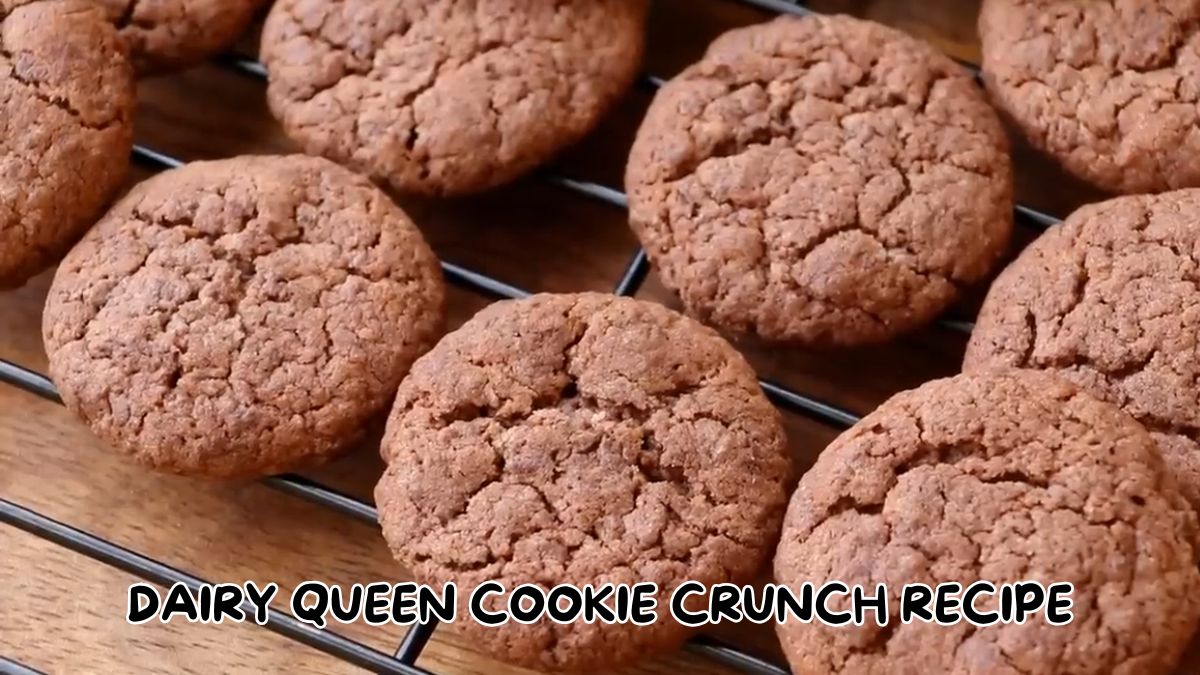
Dairy Queen Cookie Crunch Recipe
The Dairy Queen Cookie Crunch Recipe lets you make a crunchy, chocolatey treat at home, so you don’t need to go to Dairy Queen. Each bite combines crunchy cookies with creamy ice cream, making this dessert hard to resist.
Some of my best summer memories come from visiting Dairy Queen with my family after long afternoons outside. I usually ordered the Cookie Crunch because I loved how the smooth ice cream mixed with the little chocolate cookie pieces.
Now, you don’t have to wait for your next ice cream trip to enjoy it.
What Is Dairy Queen Cookie Crunch?
Dairy Queen Cookie Crunch is a mix of small chocolate cookie pieces coated in a light fudge layer, adding a crunchy bite to soft, creamy desserts. The flavor leans rich and chocolatey, with a slight bitterness from the cookie that balances the sweetness of the fudge coating.
Dairy Queen uses this topping inside Blizzard treats, ice cream cakes, and several sundae options, folding it into the soft serve for extra texture in every spoonful. People often mix up Cookie Crunch with Crunch Coat, but the two serve different purposes.
Crunch Coat is the crisp shell wrapped around the outside of certain frozen bars, while Cookie Crunch stays mixed inside the dessert itself. Regular cookie toppings, like crushed sandwich cookies, tend to soften fast once they touch ice cream, but Cookie Crunch holds its texture longer, thanks to that thin fudge shell around each piece.
What Is the Chocolate Crunch Layer in a Dairy Queen Ice Cream Cake?
The chocolate crunch layer in a Dairy Queen Ice Cream Cake sits between two layers of soft serve, giving the cake that middle-bite texture cake lovers look forward to. This layer is made from small chocolate cookie pieces coated in a thin layer of fudge, then mixed with a bit of oil to keep everything spreadable.
The cookie pieces bring a mild chocolate flavor with some crunch, while the fudge coating locks in moisture and keeps the pieces from turning soggy once the cake sits in the freezer. This coating is the main reason the layer stays crunchy for days, since it forms a barrier between the cookie bits and the cold, moist ice cream around it.
Crushed Oreos, on the other hand, soak up moisture fast and lose their crunch within hours, which is why Dairy Queen sticks with its own fudge-coated cookie blend instead.

Copycat Recipe Comparison
A homemade batch of Cookie Crunch gets pretty close to the Dairy Queen version, though the store-bought fudge coating gives theirs a slightly glossier finish and a more even crunch in every piece.
My version leans a little richer in chocolate flavor, since I control the cocoa amount myself, and the texture stays close to the original with a light fudge shell around each cookie bit. Compared to an Oreo Blizzard, Cookie Crunch has a deeper, more bitter chocolate taste, while Oreo pieces bring more sweetness and a lighter crunch that fades faster in cold cream.
Regular cookies-and-cream desserts usually rely on plain crushed cookies without any coating, so they turn soft within minutes of mixing. Cookie Crunch stands apart because of that fudge shell, which keeps each piece crisp and gives the whole dessert a candy-like bite that regular cookie toppings can’t match.
Ingredients for Dairy Queen Cookie Crunch Copycat
For the chocolate crunch cookies
¾ cup all-purpose flour: This helps create the cookie dough’s structure.
2 tablespoons cocoa powder: This gives the cookies a rich chocolate color and taste. You can use Dutch-process cocoa for a smoother flavor.
¾ teaspoon baking powder: This helps the cookies rise a bit, making them light and crunchy.
⅛ teaspoon baking soda: This balances the acidity of the cocoa powder.
¼ cup butter, softened: This adds richness and keeps the cookies tender. You can use plant-based butter for a dairy-free option.
6 tablespoons powdered sugar: This sweetens the dough without making it gritty.
1 ½ tablespoons milk: This helps form the dough into a soft, workable ball. Any plant milk works too.
For the fudge coating
½ cup dark chocolate chips: These melt into a smooth coating for the cookies.
1 tablespoon vegetable oil: This thins the melted chocolate so it coats the cookies evenly. You can also use coconut oil for a mild coconut flavor.
For the creamy chocolate base
2 cups vanilla ice cream, softened: This creates the creamy part of the dessert. You can use dairy-free vanilla frozen dessert for a plant-based option.
¼ cup chocolate syrup: This adds extra chocolate flavor and creates a ripple through the base.
Tools I Use to Make Dairy Queen Cookie Crunch
- Mixing bowls: For the dough and coating.
- Hand mixer: To cream the butter smoothly.
- Baking sheet: To hold the cookies while baking.
- Parchment paper: To prevent the cookies from sticking.
- Rolling pin: To flatten the dough evenly.
- Small saucepan: To melt the chocolate for coating.
- Freezer-safe container: To store the finished dessert.
How to Make Dairy Queen Cookie Crunch at Home
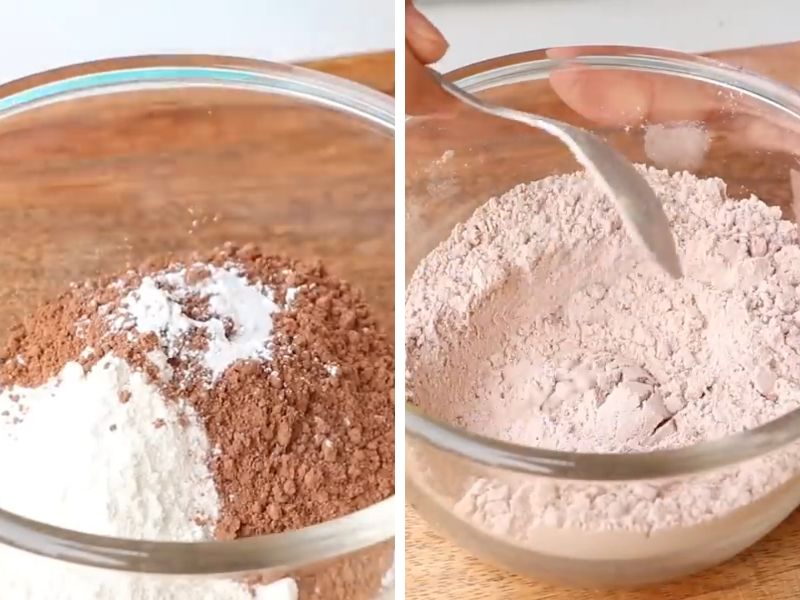
1. Mix the Dry Ingredients: In a medium bowl, combine flour, cocoa powder, baking powder, and baking soda. Use a whisk to stir for about 30 seconds until everything is well mixed and no clumps of cocoa remain.
2. Cream the Butter and Sugar: In another bowl, beat softened butter and powdered sugar together for about two minutes until the mixture is light and fluffy. Then, add milk and mix for another 15 seconds.
3. Form the Dough: Slowly add the dry ingredients to the butter mixture in two batches. Gently fold it in with a spatula until a soft, smooth dough forms. Cover the dough and let it rest at room temperature for 10 minutes.
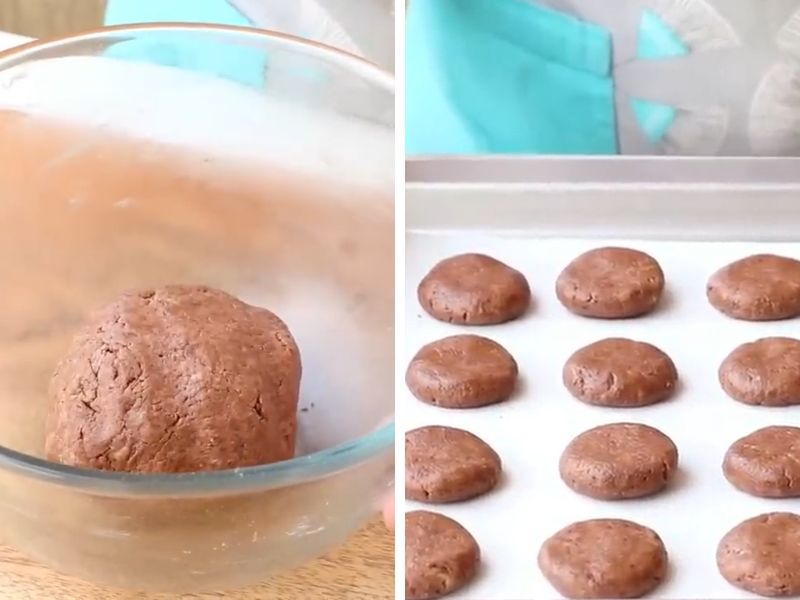
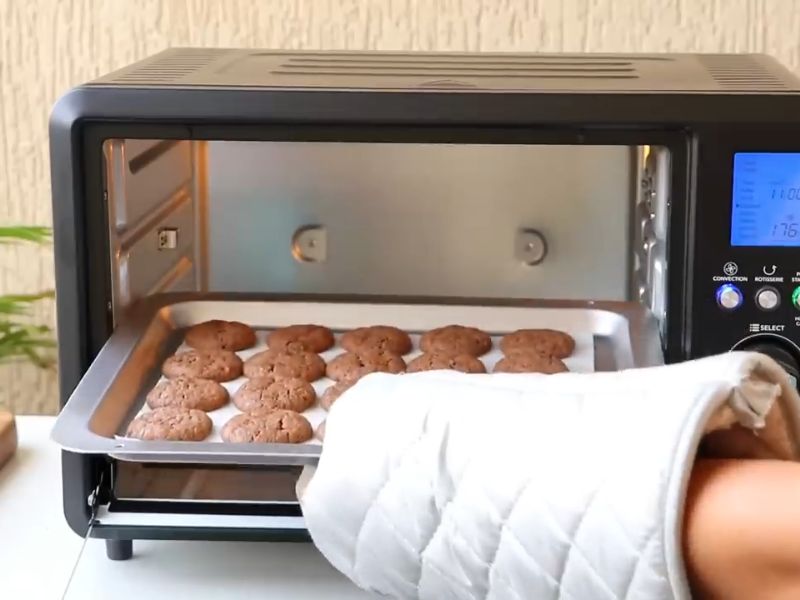
4. Bake the Cookies: Preheat your oven to 170°C (340°F) for 10 minutes. Roll the dough on parchment paper until it is about a quarter-inch thick, then cut it into small squares. Bake for 13 to 14 minutes until the edges are firm and slightly darker. Let the cookies cool completely on the tray before moving them.
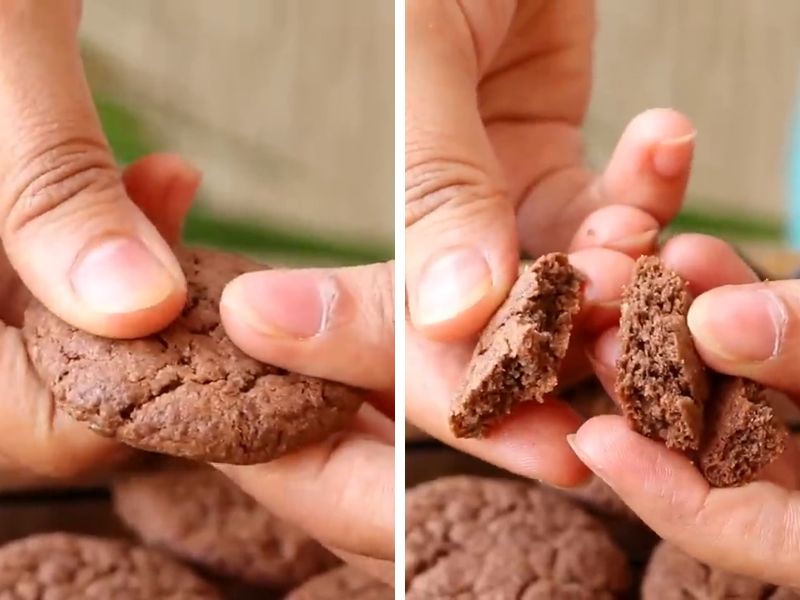
5. Crumble the Cookies: Once the cookies are cool, break them into small, uneven pieces with your hands or the back of a spoon. Aim for small chunks for a better crunch, and avoid making fine crumbs.
6. Make the Fudge Coating: In a small saucepan over low heat, melt dark chocolate chips and vegetable oil together. Stir often until the mixture is smooth and shiny.
7. Coat the Cookie Pieces: Pour the melted chocolate over the crumbled cookie pieces and gently stir to coat them. Spread the coated pieces on parchment paper and freeze for 10 minutes until firm.
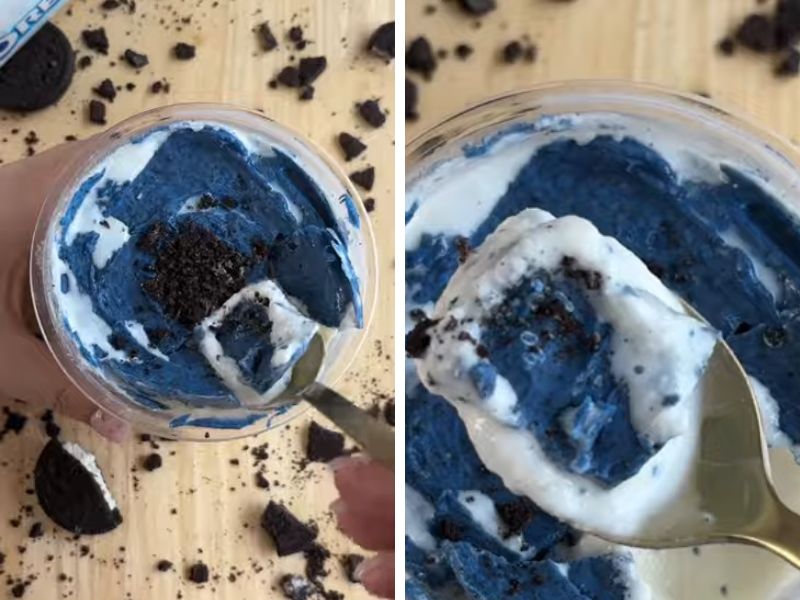
8. Mix the Creamy Chocolate Base: Stir chocolate syrup into softened vanilla ice cream until you see soft, marbled chocolate streaks.
9. Fold in the Cookie Crunch: Gently fold the frozen cookie pieces into the chocolate ice cream base, keeping some pieces whole for texture. Spoon the mixture into cups or a container and freeze for at least two hours before serving.
Common Mistakes and How to Fix Them
Cookie crunch becomes soggy: This happens when the fudge coating is too thin. Coat each piece twice and freeze them completely before adding them to the ice cream.
Dessert becomes icy: Ice crystals form when the ice cream base is left uncovered in the freezer. Press plastic wrap directly onto the surface before sealing the container.
Cookies lose crunch: This usually happens when you mix in cookie pieces while the base is too warm. Let the ice cream soften a little before mixing.
Texture turns too soft: A soft texture usually means there’s too much milk in the dough. Stick to the measured amount and add only a little extra if the dough feels dry.
Dessert melts too quickly: This indicates that the base wasn’t cold enough before going into the freezer. Chill your mixing bowl first to help the base firm up faster.
Flavor doesn’t taste like Dairy Queen: A flat flavor often comes from skipping the cocoa in the cookie dough. Use Dutch-process cocoa for the closest match to that signature taste.
Too much chocolate flavor: Cut the amount of chocolate syrup in the base by half, and use less fudge coating on the cookie pieces.
Not enough cookie crunch: Add another batch of crumbled cookie pieces, and fold them in during the last minute to keep them whole and crisp.
Other Ways I Prepare Dairy Queen Cookie Crunch Recipe
No-Bake Cookie Method
To make cookies quickly, I use store-bought chocolate wafer cookies instead of baking my own. I crush the wafers into small pieces by hand, mix them with melted fudge, and then freeze the coated pieces on a tray.
All I need is a mixing bowl, a small saucepan, and a freezer-safe tray for this method.
Blender Method
For a smoother cookie crumb, I use a blender to pulse the baked cookies into small pieces. This gives me a more even mix that spreads well in the chocolate base.
I only need a blender and a mixing bowl for this method.
Stovetop Fudge Method
Sometimes, I melt the chocolate coating using a heatproof bowl over a pot of gently simmering water instead of a saucepan on low heat. This method prevents the chocolate from burning and gives a shinier coating on the cookie pieces.
I need a heatproof bowl, a small pot, and a spatula for this process.
Dairy Queen Cookie Crunch Recipe Variations
Cookies and Cream Delight: Mix crushed vanilla sandwich cookies and chocolate crunch pieces into the creamy base for added crunch and a classic cookies-and-cream flavor.
Brownie Cookie Crunch: After baking, add chewy brownie bites to the cookie mixture for a rich, fudgy layer with the crunchy cookies. This is perfect for chocolate lovers, especially when served with a scoop of vanilla ice cream.
Peanut Butter Cookie Crunch: Stir warm, creamy peanut butter into the base before adding the crunchy cookie pieces. The peanut butter makes the dessert richer and slightly salty.
Mint Chocolate Cookie Crunch: Add a little peppermint extract to the creamy base, and then mix in chocolate cookie crunch pieces. The cool mint balances the sweetness well, making this version great for holiday parties or after a big dinner.
Caramel Cookie Crunch: Drizzle caramel sauce between layers of the cookie crunch mixture for a buttery, sweet-and-salty finish. I usually serve this one chilled with extra caramel on top when I want a more indulgent dessert.
Serving Ideas for Dairy Queen Cookie Crunch
This dessert is flexible and can be served in various ways. You can top vanilla soft serve with it to create a Cookie Crunch sundae or mix it with milk for a thick, spoonable Blizzard-style treat.
If you prefer a drinkable option, blend it with more milk for a milkshake. You can also layer it between scoops of soft serve for a homemade cake. For parties, serve it in small cups so each guest gets a portion without the need for scooping.
This dessert pairs well with warm brownies or chocolate cake, as the cold, crunchy texture contrasts with the warm, soft desserts.
Storage and Make-Ahead Tips
You can freeze this dessert for later use. It will stay good in the freezer for up to 2 weeks if you seal it tightly in an airtight container. This keeps out moisture and smells from other foods. If you store the leftover crunch topping separately from the creamy base, it can last even longer, about a month, since it won’t absorb moisture from the ice cream.
To keep the crunch topping crispy, store it in a sealed bag with the air pressed out before sealing. You can prepare the cookie crunch mix a few days in advance, coat it in fudge, and keep it in the freezer until you’re ready to mix it with the creamy base.
Dairy Queen Cookie Crunch Recipe

Make this easy Dairy Queen Cookie Crunch Recipe at home with crushed cookies, fudge, and vanilla ice cream in minutes.
Ingredients
- 2 cups vanilla ice cream, softened
- 1 cup chocolate sandwich cookies, crushed
- ½ cup fudge topping
- ¼ cup chocolate cookie crumbs (for topping)
- 2 tablespoons mini chocolate chips
- 1 tablespoon caramel sauce (optional drizzle)
Instructions
- In a medium bowl, combine flour, cocoa powder, baking powder, and baking soda. Use a whisk to stir for about 30 seconds until everything is well mixed and no clumps of cocoa remain.
- In another bowl, beat softened butter and powdered sugar together for about two minutes until the mixture is light and fluffy. Then, add milk and mix for another 15 seconds.
- Slowly add the dry ingredients to the butter mixture in two batches. Gently fold it in with a spatula until a soft, smooth dough forms. Cover the dough and let it rest at room temperature for 10 minutes.
- Preheat your oven to 170°C (340°F) for 10 minutes. Roll the dough on parchment paper until it is about a quarter-inch thick, then cut it into small squares. Bake for 13 to 14 minutes until the edges are firm and slightly darker. Let the cookies cool completely on the tray before moving them.
- Once the cookies are cool, break them into small, uneven pieces with your hands or the back of a spoon. Aim for small chunks for a better crunch, and avoid making fine crumbs
- In a small saucepan over low heat, melt dark chocolate chips and vegetable oil together. Stir often until the mixture is smooth and shiny.
- Pour the melted chocolate over the crumbled cookie pieces and gently stir to coat them. Spread the coated pieces on parchment paper and freeze for 10 minutes until firm.
- Stir chocolate syrup into softened vanilla ice cream until you see soft, marbled chocolate streaks.
- Gently fold the frozen cookie pieces into the chocolate ice cream base, keeping some pieces whole for texture. Spoon the mixture into cups or a container and freeze for at least two hours before serving.
Nutrition Information:
Yield:
8Serving Size:
1Amount Per Serving: Calories: 320
You can still find the DQ Cookie Crunch at most locations, but making it at home is cheaper. By preparing a larger batch, you can use the same ingredients for several servings without higher costs.
This Dairy Queen Cookie Crunch Recipe is budget-friendly, easy to freeze, and simple to make repeatedly.